1. Open up your metal tag and save it under a new name.
2. Make a new layer above your tag (LAYER>NEW) and use the TEXT tool to type your word/words in black. For my tutorial I used Courier(T1) but other fonts work well, too.
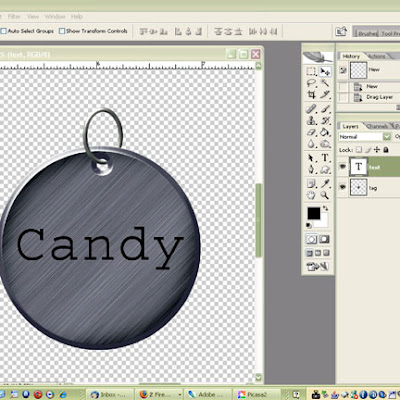
3. Now make sure your text layer is selected. We are going to add a bevel and emboss layer style. Open the layer style dialog box (by clicking LAYER>LAYER STYLE>BEVEL AND EMBOSS).
4. If you're using a font similar to this one, you can leave everything as the default setting except change the direction from UP to DOWN...
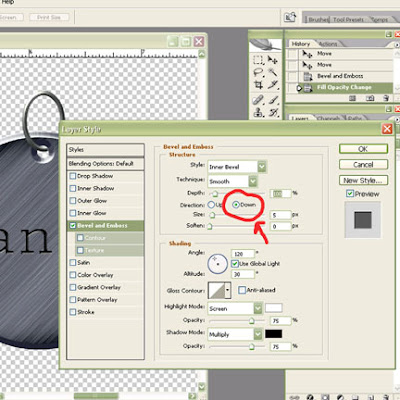 ...However, if you chose a different, bolder font, you may have to play with other settings to get a desired effect. Click OK.
5. Now, make sure your text layer is still selected and change the FILL value to anywhere from 0% to 30%. I used 30% for this font but other fonts look better with the fill value set to zero%.
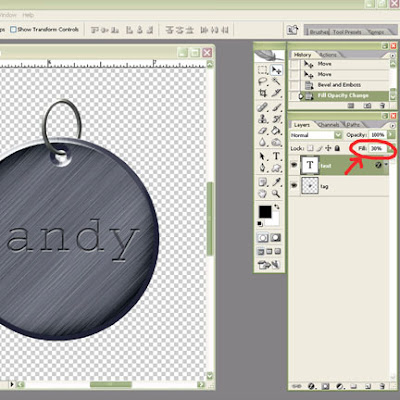
When you are happy with your engraving, you can save your new engraved tag as a PNG and use it in your layouts! Let me know if you have any questions about this tutorial, my e-mail is at the top left corner.
ALSO: for a tutorial on attaching your tag to the collar, Misty Cato has a great tutorial that explains the technique HERE
Have Fun!


3 comments:
christine, you are simply the best! first you give us cool tags and then a super tutorial on how to engrave them! thank you just isn't enough sometimes, but i don't know what else to say - so, thank you!
:) M
Thank you for the tutorial. I am always looking for new ones. :)
Thanks for sharing this tutorial, it looks like it'll really come in handy.
Post a Comment